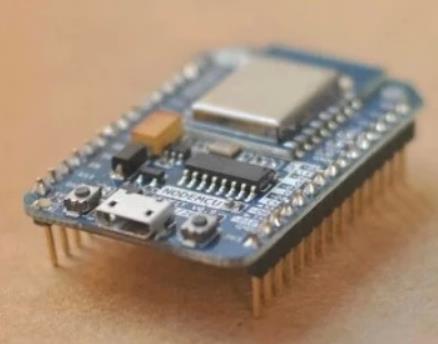
选NodeMCU的理由是它足够便宜,另一个就是开源
这样就不会有人为的障碍阻挡你的脚步了,站在巨人的肩膀上,让花费的时间更有意义。
我们选乐为物联作为插排的管理平台,当然也可以选择其他各种平台,感觉目前都不甚成熟。
首先我们需要接通平台,凡事要先从简单的来,太复杂的往往走的弯路更多
用途
电脑BOIS设置通电开机,然后微信控制开关机。
虽说我手上已经有几个现成得智能插座,但是生活在于折腾折腾!
init.lua
- --全局变量
- bConnected=false
- Is_wifi_Ok=false
- Is_First=true
-
-
- local luaFile = {"sta.lua"}
- for i, f in ipairs(luaFile) do
- if file.open(f) then
- file.close()
- print("Compile File:"..f)
- node.compile(f)
- print("Remove File:"..f)
- file.remove(f)
- end
- end
-
- local luaFile = {"mysocket.lua"}
- for i, f in ipairs(luaFile) do
- if file.open(f) then
- file.close()
- print("Compile File:"..f)
- node.compile(f)
- print("Remove File:"..f)
- file.remove(f)
- end
- end
-
- dofile("sta.lc");
- dofile("mysocket.lc");
- luaFile = nil
- collectgarbage();
sta.lua
- --Created @ 2015/05/14 by Doit Studio
- --Modified: null
- --http://www.doit.am/
- --http://www.smartarduino.com/
- --http://szdoit.taobao.com/
- --bbs: bbs.doit.am
- gpio.write(1,gpio.LOW)
- gpio.write(2,gpio.LOW)
- gpio.write(3,gpio.LOW)
- gpio.write(4,gpio.LOW)
- gpio.write(5,gpio.LOW)
- gpio.write(6,gpio.LOW)
- gpio.mode(1,gpio.OUTPUT)
- gpio.mode(2,gpio.OUTPUT)
- gpio.mode(3,gpio.OUTPUT)
- gpio.mode(4,gpio.OUTPUT)
- gpio.mode(5,gpio.OUTPUT)
- gpio.mode(6,gpio.OUTPUT)
- gpio.write(1,gpio.HIGH)
- gpio.write(2,gpio.HIGH)
- gpio.write(3,gpio.HIGH)
- gpio.write(4,gpio.HIGH)
- gpio.write(5,gpio.HIGH)
- gpio.write(6,gpio.HIGH)
-
-
- wifi.setmode(wifi.STATION)
-
- --需要修改的地方
- wifi.sta.config("xxxxx","12345678")
- --需要修改的地方
-
-
- print("\nwifi.sta.connetct...")
- wifi.sta.connect()
- local cnt = 0
- tmr.alarm(0, 1000, 1, function()
- if (wifi.sta.getip() == nil and (cnt < 20)) then
- print("Trying Connect to Router, Waiting...")
- cnt = cnt + 1
- --if cnt%2==1 then gpio.write(0,gpio.LOW); --闪灯
- --else gpio.write(0,gpio.HIGH); end
- else
- tmr.stop(0);
-
- if (cnt < 20) then print("Conected to Router MAC:"..wifi.sta.getmac().." IP:"..wifi.sta.getip())
- else print("Conected to Router Timeout!!!")
- end
- --gpio.write(0,gpio.LOW); --关闭状态灯
- cnt = nil;cfg=nil;str=nil;ssidTemp=nil;
- collectgarbage()
- tmr.alarm(1, 3000, 1, function() --3秒检查一下状态
- if(wifi.sta.status()~=5) then
- --node.restart()
- end
- end)
- end
- end)
mysocket.lua
- local server = "tcp.lewei50.com"--"192.168.1.129"--
- local port = 9960
- local bConnected = false
- --需要修改的地方
- local gateWay = "01"
- local userKey = "faedd4cc354d49fexxxxxxxxxx"
- --需要修改的地方
-
- local uSwitchNode = nil
- local strOnline = ""
- local str1=""
- local sw1="0"
- local sw2="0"
- local sw3="0"
- local errcnt=0
- local IsSendOK=true
-
-
- --get value from string like "p1":"1","f":"getAllSensors"
- local function getStrValue(str,strName)
- i,j = string.find(str,"\""..strName.."\":\"")
- k,l = string.find(string.sub(str, j+1, -1),"\"")
- return string.sub(str, j+1,j-1+l)
- end
-
- function sw_refresh(sel,val)
- print(sw1,sw2,sw3)
- if(sel=="1") then
- if val=="1" then
- sw1="1"
- gpio.write(1,gpio.HIGH)
- else
- sw1="0"
- gpio.write(1,gpio.LOW)
- end
- end
- if(sel=="2") then
- if val=="1" then
- sw2="1"
- gpio.write(2,gpio.HIGH)
- else
- sw2="0"
- gpio.write(2,gpio.LOW)
- end
- end
- if(sel=="3") then
- if val=="1" then
- sw3="1"
- gpio.write(3,gpio.HIGH)
- else
- sw3="0"
- gpio.write(3,gpio.LOW)
- end
- end
- if(sel=="4") then
- if val=="1" then
- gpio.write(4,gpio.HIGH)
- else
- gpio.write(4,gpio.LOW)
- end
- end
- if(sel=="5") then
- if val=="1" then
- gpio.write(5,gpio.HIGH)
- else
- gpio.write(5,gpio.LOW)
- end
- end
- if(sel=="6") then
- if val=="1" then
- gpio.write(6,gpio.HIGH)
- else
- gpio.write(6,gpio.LOW)
- end
- end
- end
-
- local function dealResponse(str)
- ufunctionName = getStrValue(str,"f")
- if(ufunctionName == "writeSerial") then
- uswitchName = getStrValue(str,"p1")
- uswitchValue = getStrValue(str,"p2")
- sw_refresh(uswitchName,uswitchValue)
- nodeStr= "{\"method\":\"response\",\"result\":{\"successful\":true,\"message\":\"TD Write serial OK.\"}}&^!"
- socket:send(nodeStr)
- nodeStr = nil
- str = nil
- end
- str = nil
- end
-
- socket=net.createConnection(net.TCP, 0)
- socket:on("connection", function(sck, response)
- socket:send(strOnline)
- print (strOnline)
- tmr.delay(500000)
- str1= "{\"method\":\"upload\",\"data\":[" .. "{\"Name\":\"SW1\",\"Value\":\"" .. sw1 .. "\"},{\"Name\":\"SW2\",\"Value\":\"" .. sw2 .. "\"},{\"Name\":\"SW3\",\"Value\":\"" .. sw3 .. "\"}" .. "]}&^!\r\n"
- socket:send(str1)
- print (str1)
- bConnected = true
- end)
-
- socket:on("disconnection", function(sck, response)
- bConnected = false
- end)
-
- socket:on("receive", function(sck, response)
- dealResponse(response)
- print("return ok!")
- end)
-
- socket:on("sent", function(sck, response)
- print(tmr.now().."sent")
- end)
-
-
- strOnline = "{\"method\":\"update\",\"gatewayNo\":\""..gateWay.."\",\"userkey\":\""..userKey.."\"}&^!"
- socket:connect(port, server)
-
- tmr.alarm(4, 5000, 1, function()
- if(not IsSendOK) then
- errcnt=errcnt+1
- if(errcnt>10) then
- --node.restart()
- end
- end
- str1= "{\"method\":\"upload\",\"data\":[" .. "{\"Name\":\"SW1\",\"Value\":\"" .. sw1 .. "\"},{\"Name\":\"SW2\",\"Value\":\"" .. sw2 .. "\"},{\"Name\":\"SW3\",\"Value\":\"" .. sw3 .. "\"}" .. "]}&^!\r\n"
- print(str1)
- socket:send(str1)
- IsSendOK=false
- end)
LuaLoader.exe上传LUA文件
ESP8266Flasher.exe烧录固体
nodemcu_float_0.9.6-dev_20150704.bin
很多人问的问题实在比较简单,这些还是baidu吧,因为基础不一样,需求也不一样,有些弯路也是需要走走的。以下链接供参考
用NodeMCU(ESP8266)打造超级实用的智能插排
http://www.geek-workshop.com/forum.php?mod=viewthread&tid=24907&highlight=%B2%E5%C5%C5
DIY超级智能插排来了!!!(NodeMCU、射频、温湿度DHT、DS18B20)
http://www.geek-workshop.com/forum.php?mod=viewthread&tid=27421&highlight=%B2%E5%C5%C5
用DIY智能插排自动开关路由器电源
http://www.geek-workshop.com/forum.php?mod=viewthread&tid=24980&highlight=%B2%E5%C5%C5
乐为物联开发者指南
http://www.lewei50.com/dev/content/about?sk=63
lua教程
http://www.yiibai.com/lua/
Lua 语言 15 分钟快速入门
http://blog.jobbole.com/70480/
NodeMCU之旅(一):构建、刷入固件,上传代码
http://www.cnblogs.com/wangzexi/p/5696925.html